Speech with Streaming Text
Welcome to this tutorial series in robotics powered by the BOW SDK. Speech with Streaming Text
The recommended robots for this tutorial are:
- a quadruped like the DEEP Robotics - Lite 3
- a humanoid like the Softbank Robotics - Nao.
Prerequisites
Before trying these tutorials, make sure you have followed the instructions from the dependencies step to set up the development environment for your chosen programming language.
These tutorials also assume you have installed the BOW Hub available for download from https://bow.software and that you have subscribed with a Standard Subscription (or above) or using the 30 day free trial which is required to simulate robots.
This tutorial has different requirements depending on what TTS method you choose to use. The requirements are listed in each sections' tutorial.
Environment Variables
To run this tutorial, you will need to set some environment variables to configure certain aspects of the TTS system. These variables are:
| KEY | VALUE | EXPLANATION |
|---|---|---|
| OPENAI_API_KEY | sk-.... | The OpenAI API Key that you obtained earlier and is needed to call the OpenAI API |
| WILLOW_SERVER_URL | https://127.0.0.1:19000/api/tts | The URL of the Willow TTS Server that was setup earlier. |
| USE_OPENAI | False | Used to change between using the Willow TTS Server or OpenAI for TTS generation |
To set them, you will first need to copy the example environment file over, you can do this by running the following command:
Then open the .env file in your editor of choice and set the values as needed.
Generating the TTS Voice
To perform local inference on your hardware, you will need to be on Linux or Windows Subsystem for Linux, have Docker installed and for CUDA support you will need to have the NVIDIA drivers for your supported hardware.
To make your Robots interactive, BOW supports low-latency bidirectional audio streaming powered by our SDK. To generate the text to speech locally we will be using Willow IS which is a performant, open-source & self-hosted inference server which will provide an HTTP API that our code can call.
Willow TTS [Local]
To setup Willow on your local machine head over to the Github Repository and follow the installation instructions to get the inference server installed and running on your local computer. When you get to the gen-cert step, use 127.0.0.1 as the hostname
If during the install step you get an error stating that:
docker: Error response from daemon: could not select device driver "" with capabilities: [[gpu]]
ensure you have the NVIDIA Container Toolkit installed.
Once you have successfully ran ./utils.sh run you should be able to navigate to https://127.0.0.1:19000/api/docs and the API documentation page should load.
To test that everything is working correctly before getting it working with your Robot, you can use the web UI to enter a test phrase and have it be converted to a mp3 for playback. You can do this by
Open your web browser if you haven't already and navigate to https://127.0.0.1:19000/api/docs, you should be presented with a view such as below.
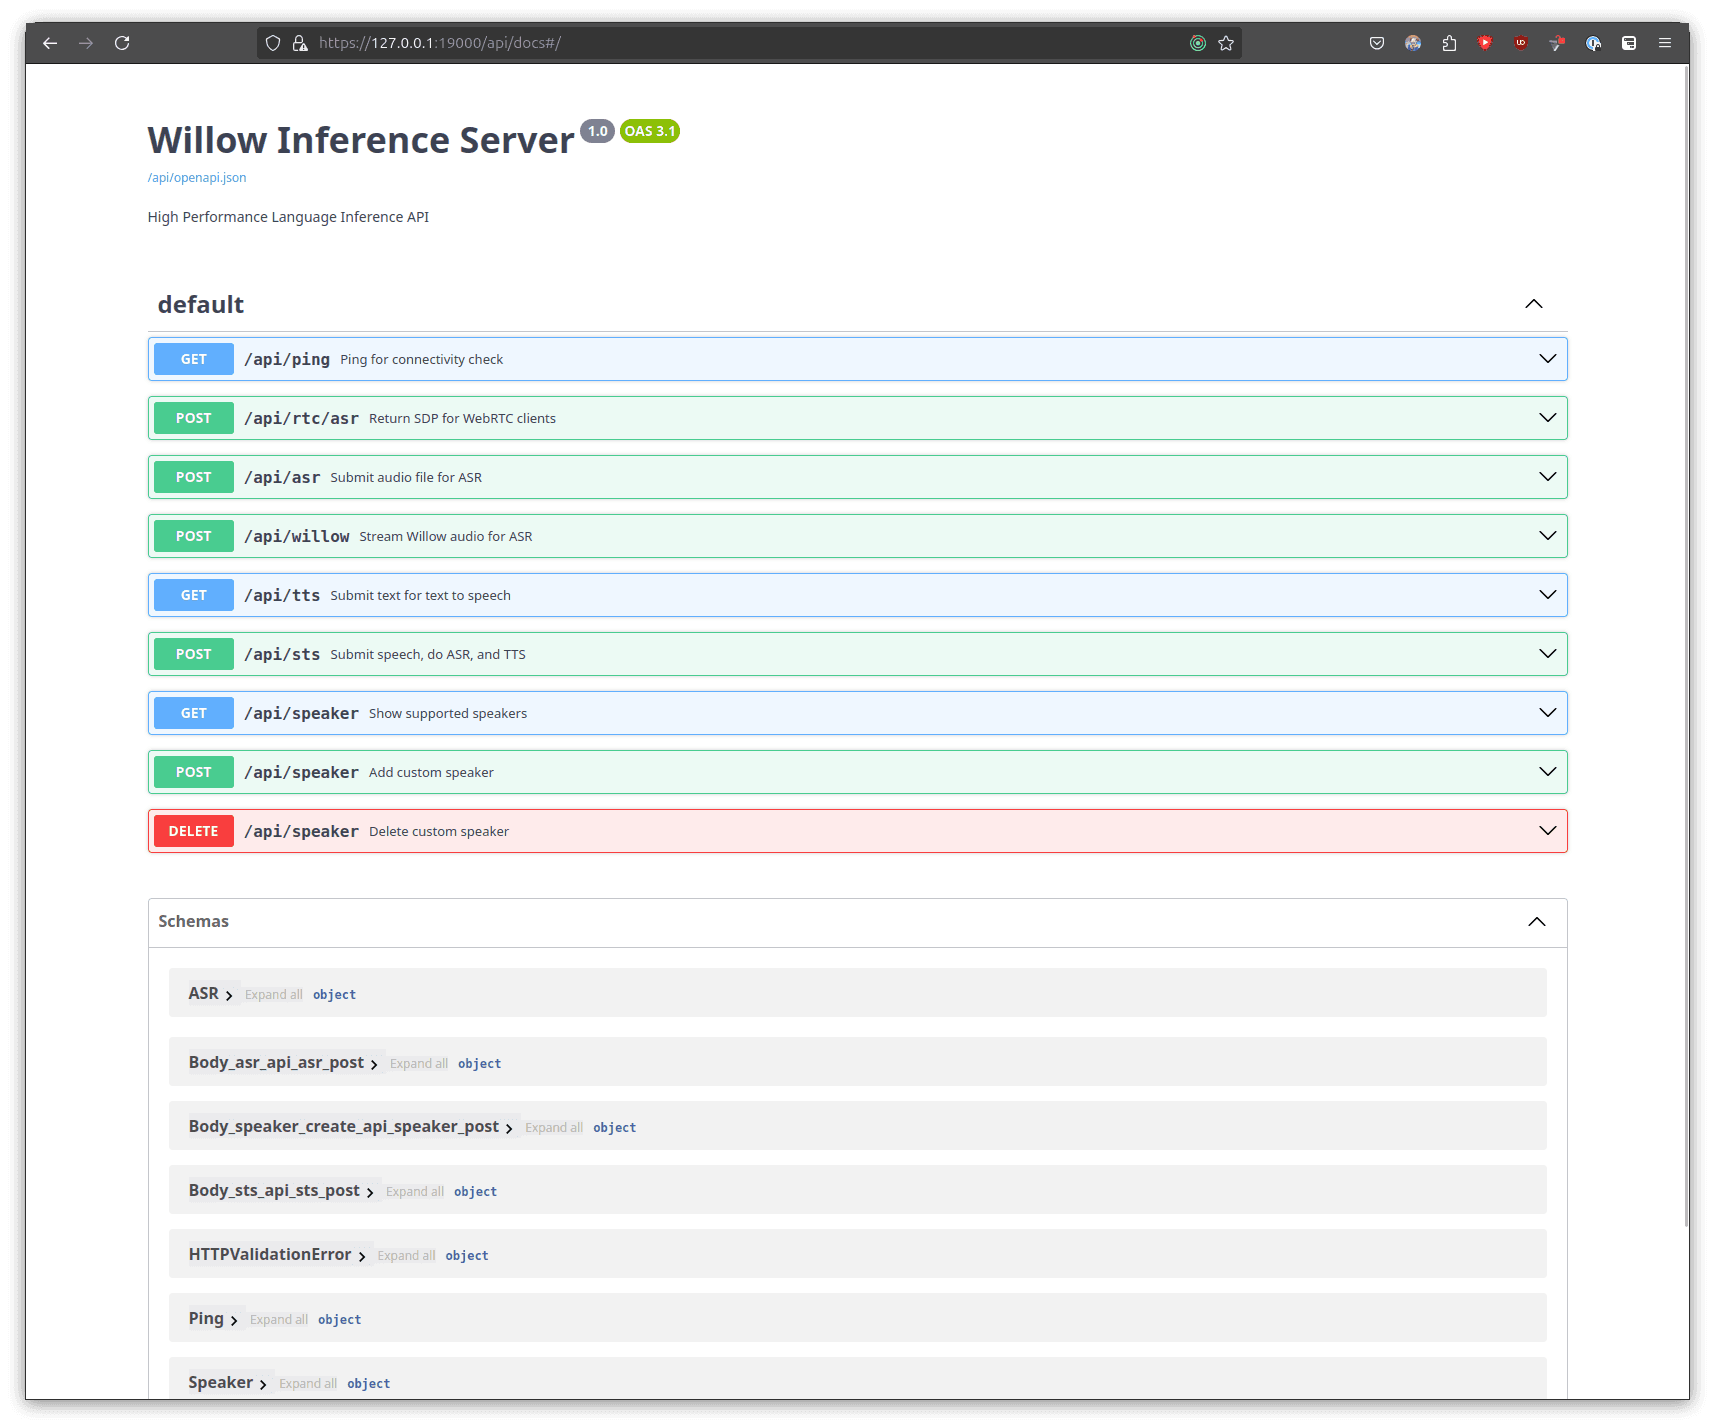
You might need to trust the certificates in your browser before connecting to the page.
To test the TTS query, navigate to the GET /api/tts section and click on the "Try it out" button and enter the following information into the parameters:
| Name | Description |
|---|---|
| text | The quick brown fox jumped over the lazy dog |
| format | mp3 |
| speaker | CLB |
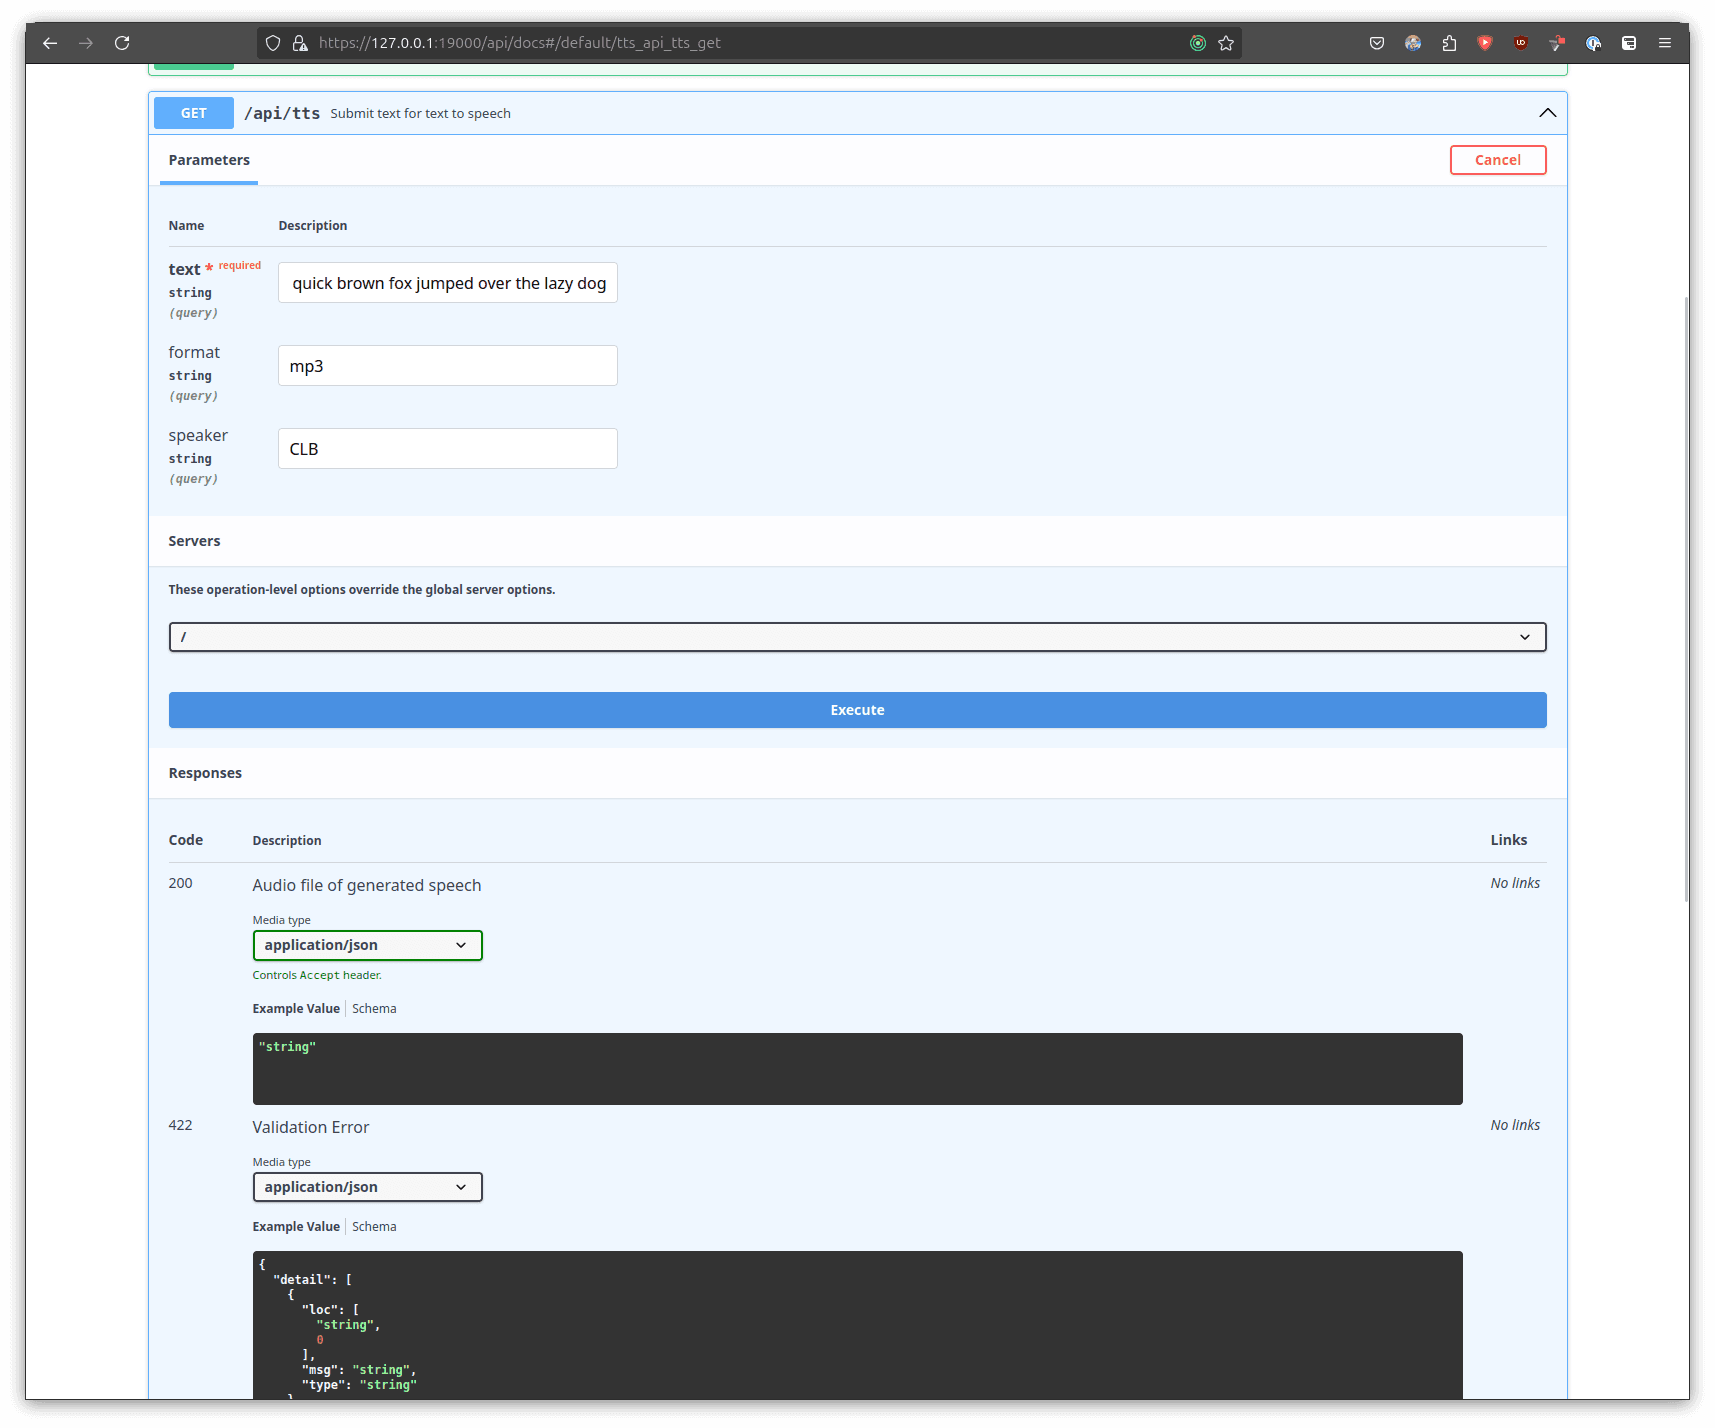 |
Feel free to try out other sentences in the text section!
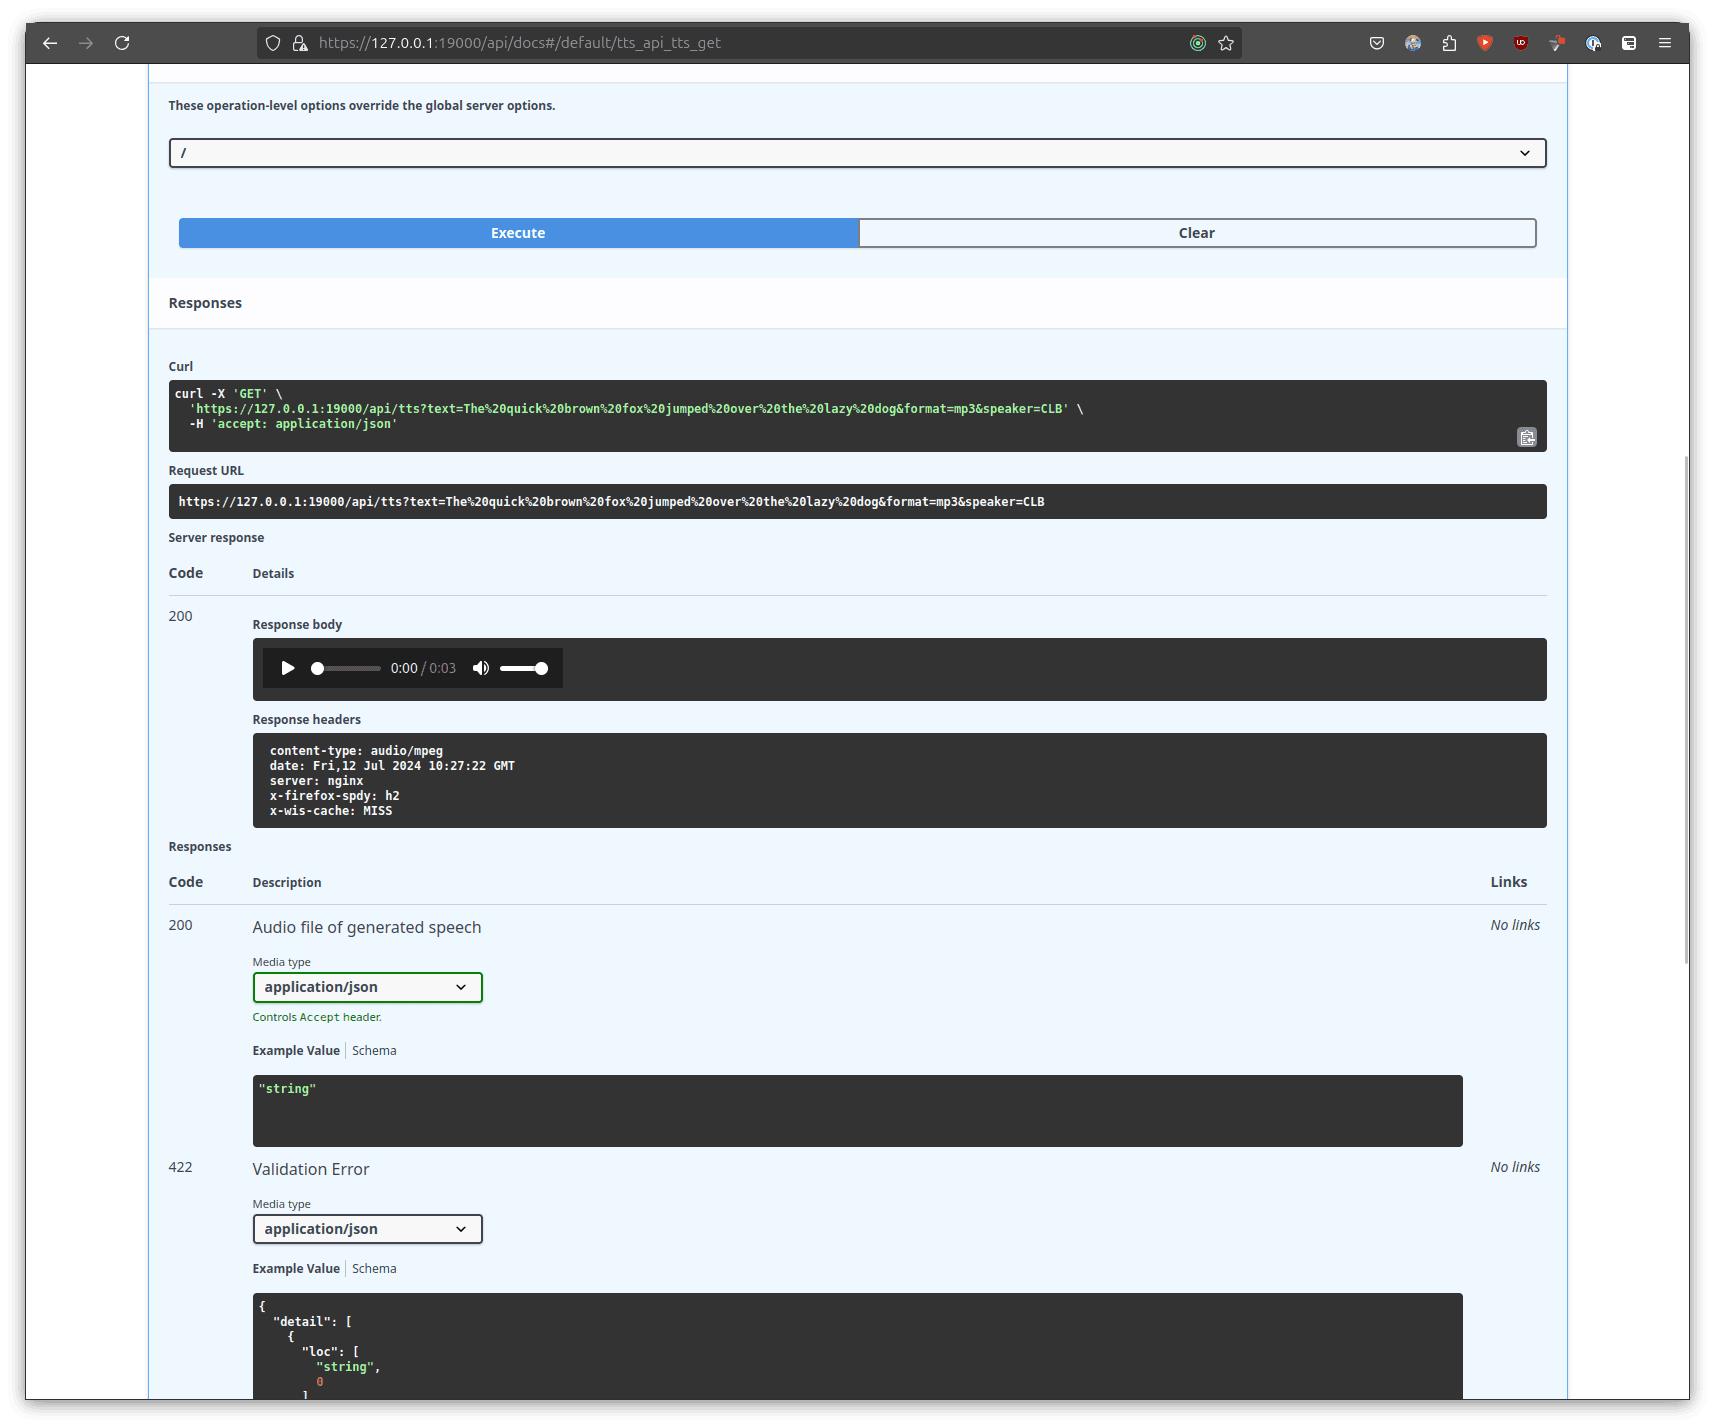
Once you have setup the parameters as mentioned above, you can then generate the audio by clicking execute and waiting for the server to respond.
Depending on your hardware and the TTS model being used this can take a while! Have a look at settings.py inside the willow-inference-server repository that you cloned earlier to change the default model used. The settings key is: whisper_model_default
Once the server has generated the response you will be able to see in the "Responses" that inside the response body there is a playable audio file. Click play to listen to the generated audio.
Making Robots Talk
In this section, we'll explore how to make our robot talk using text-to-speech (TTS) capabilities.
The provided code uses a combination of the TTS class and a speech queue system
to generate and stream audio to the robot.
Understanding the TTS System
The TTS system in this tutorial consists of several key components:
- TTS Class: Handles the conversion of text to speech using either OpenAI or Willow services.
- Speech Queue: Manages speech commands to ensure smooth processing and prevent overlaps.
- Speech Processing Thread: Continuously processes the speech queue in the background.
Key Components:
- Service Selection: The system can use either OpenAI or Willow for TTS generation, controlled by the
USE_OPENAIenvironment variable. - Speech Queue: A thread-safe queue (
self.speech_queue) that holds pending speech commands. - Speech Processing Thread: A dedicated thread (
self.speech_thread) that continuously processes the speech queue.
How Audio Chunking Works:
- Text-to-Speech Conversion: The text is first converted into an audio segment using the selected TTS service.
- Preparing Raw Audio Data: The audio segment is converted to raw audio data.
- Chunking and Streaming:
The raw audio data is split into chunks and streamed to the robot.
The chunk size is determined by the
CHUNK_SIZEconstant, which is calculated based on the sample rate and number of channels.
- Timing Control: A small delay is added between sending each chunk to control the streaming rate.
Audio Parameters
The audio parameters are crucial for ensuring compatibility between the TTS system and the robot's audio processing capabilities. These parameters are set before connecting to the robot:
These parameters define the audio format (sample rate, number of channels), compression format, and transmission rate. They ensure that the audio chunks are correctly formatted for the robot's audio system.
Speech Queue Processing
To manage multiple speech commands efficiently, a queue system is implemented:
This queue system allows for smooth handling of multiple speech commands, preventing overlaps and ensuring each command is processed in order.
Running the Tutorial
If you are going with local TTS Inference then you will need to startup the TTS Server (if its not already running!).
To do this you will need to navigate to the willow-inference-server folder that you setup earlier and run the server using the utils.sh script.
In another terminal, navigate to the Speech_Streaming_Text folder within the SDK Tutorials repository that you cloned earlier.
Then navigate to the language that you would like to use, in this case it will be Python
Finally execute the example program according to your languages standards. For python this would be:
For python make sure that you are running the code inside a Virtual Environment
Each language folder will contain a README that more specifically explains how to run that program in that specific languages environment. Make sure to check out the github repository here
Interacting with the Tutorial
Just like in Step 2 you can move the robot around the scene with keyboard controls, however, now you should also be able
to hear the robot vocalise periodically as it is moving around.
Alternatively you can use the V key to vocalise the current action being performed.
Keyboard Controls
| Key | Action | Description |
|---|---|---|
| W | Move Forward | Moves the robot forward |
| A | Turn Left | Turns the robot to the left |
| S | Move Backward | Moves the robot backward |
| D | Turn Right | Turns the robot to the right |
| E | Strafe Right | Moves the robot to the right without turning |
| Q | Strafe Left | Moves the robot to the left without turning |
| V | Vocalise | Uses TTS to speak the robots current action. |
Stopping
To cancel the tutorial program's execution you can press Ctrl + C in the running terminal.